Thursday, July 7, 2016

Kadai Vegetable

One of my favorite dishes from an Indian restaurant is kadai vegetable. For one, it is filled with the goodness of all kinds of vegetables and the vegetables are crunchy. The sauce is just adequate to coat the veggies and it is tangy and spicy. A perfect dish to eat with rotis or naan.


For this you will need -

1 tablespoon - Oil ( Any odorless)
1 teaspoon - Grated Ginger
1 teaspoon - Grated Garlic
1 No. - Onion (small sized) Cubed
1/2 No. - Green Pepper Cubed
1/2 No. - Yellow Pepper Cubed
8 - 10 Nos - Green Beans (Chopped into inch sized pieces)
1 No.  - Carrot (Chopped into inch sized pieces)
10 -12 No. - Broccoli Florets
1 No. - Potato Cubed
1/2 Cup - Pureed Tomato
1 tablespoon - Ketchup
1 teaspoon - Turmeric Powder
2 teaspoons - Coriander Powder
1 teaspoon - Red Chili Powder
1/2 teaspoon - Amchur Powder
1/2 teaspoon - Garam Masala Powder
1/2 teaspoon - Kasuri Methi
Salt as per your taste
A dollop of butter

Method -

Steam the chopped beans, carrot, broccoli and potatoes either in a cooker (one whistle and quick release) or outside with a pinch of salt. In the meantime, put a slit tomato or two in water and boil for 10-12 minutes. Then cover and let it stand for a few minutes. Once cool, grind the tomato without the water into a fine paste. Then, in a kadai (wok), heat oil. Once hot, add the ginger, garlic and onions. Saute for a couple of minutes and add the peppers. Saute for 5 - 10 minutes till the onion and peppers are just cooked, crunchy on the outside and soft on the inside. Now add the tomato puree. Saute a few minutes and add the steamed vegetables. Add the ketchup, turmeric, coriander and chili powders. Saute well on medium to high heat. Add the garam masala and amchur powders too. Reduce heat and cover the veggies. Allow to cook for 5 - 7 minutes. Then turn off the gas and add the kasuri methi. Finally add a dollop of butter on top.


Friday, June 24, 2016

Sandesh

This is another delectable sweet from West Bengal, a vibrant eastern state from India. Sandesh is also made from paneer. The method to make paneer is on this blog post. It is always preferable to make paneer at home for the fresher the cottage cheese the better the texture of your sweets. Of course if by some miracle you have access to real fresh paneer, then go ahead and buy that.

Sandesh is one of the easiest sweets to make and can be presented in very interesting ways. Here's one with rose petals looking so royal!


To make paneer, you will need. -

4 cups  - Whole Milk
2 tblspn - White Vinegar (mixed with 2-3 spoons of water)
Muslin Cloth

Once you have paneer, you will need -

1 cup - Sugar
Rose petals and rose essence (half a teaspoon)/ Saffron infused in milk/ cardamom powder


Method -

Knead the paneer really well for about 15-20 minutes. After kneading for 15 minutes, add sugar little by little and incorporate it into the paneer. You can reduce the quantity of sugar if you think it is too much. After that, take a wok or a wide bottom vessel and on low flame sauté the paneer sugar mixture for 4-5 minutes till the raw smell disappears. You can avoid this like I did when I made with the rose flavor. If you sauté, then sandesh will last longer, else you will have to eat it within a couple of days.

Now add the rose essence or cardamom powder if you are using any of these. Mix well. Make small balls and press flat. For rose sandesh - you add rose essence and garnish with fresh rose petals. For cardamom sandesh - just add the cardamom powder. For saffron sandesh - once you have shaped the sandesh, drizzle the saffron infused milk on each sweet. I did sauté the paneer while making the saffron ones, you can see the difference in the texture.

Serve warm or cold.


Tuesday, June 21, 2016

Honey Cake With Chocolate Ganache, Pecans And Strawberries

Luscious, golden and gooey - honey is one of my all time favorite ingredients. A spoonful of honey is something I have enjoyed all my life and my son loves it too! When I came across this recipe, I was delighted. A dear friend of mine posted the pic of her honey cake and I could already feel it's taste on my tongue! If this is not temptation, I don't know what is!


For this you will need -

250gm - Unsalted butter at room temperature
220gm - Honey
4nos - Eggs
150gm - Flour
150gm - Ground Pecans (you can use hazelnuts too)
1tspn - Baking Powder

For the ganache -

100gm - Dark Chocolate (70%)
1tspn - Butter
100ml - Single Cream
A handful of chopped pecans (or hazelnuts)
Strawberries - chopped in half

Method -

Pre heat the oven to 160deg C. Grease and dust a 24cm springform cake tin. Put a layer of parchment paper on the bottom.

In the bowl of your mixer, beat the butter till light and fluffy. Then add the honey and beat till they combine. Add the eggs, one at a time. Then add the ground nuts and flour, making sure not to over mix. The dry ingredients just need to be folded in.

Spoon the mixture, level with a spoon and bake for about 45-50 minutes till the cake is completely baked. One can check by inserting a toothpick which should come out clean.

As the cake cools, melt the chocolate in a microwave safe bowl or on a double boiler. Once melted, add the butter and the cream, in a steady stream. Mix well. Allow to cool a little and it should thicken a little.

Take the cake out of the pan and pour the ganache over it and allow to over flow just a little. Sprinkle the chopped nuts along the edge and the strawberries in the center.


Saturday, October 17, 2015

Avocado Chapathis with Soya Nugget Curry

These chapathis are super easy to make and need the fewest of ingredients. There is one caveat though - use all the dough at one go. Otherwise the avocados will oxidize. However the chapathis can be stored up to a day.
The soya nugget curry is a great accompaniment to these. Spicy, succulent and finger-licking good!


For the chapathis, you will need -

Atta (Flour) - 2 Cups approx.
Avocado - 1
Cumin Powder - 1 tsp.
Chilli Powder - 1 tsp.
Turmeric Powder - 1 tsp.
Salt - 1 tsp.
Water - About 1/2 a cup (depends on the flour )
Oil - 1 tbsp.


Method -
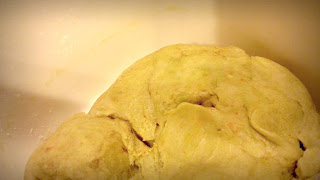
Mix all the ingredients except water and oil. This should form a semi-dough. Now add water little by little till you get a soft dough. Finally add the oil and incorporate it nicely into the dough by kneading it well. The dough will be very soft and such a treat to handle. The buttery texture of the avocados gives the dough a loving personality :)


Now make balls the size of your fist approximately and roll the out. You will have to use some flour for dusting. I tried making perfect circles but did not really succeed!


Cook it on a flat griddle, on both sides.

For the curry, you will need -

Soya Nuggets - 1/2 Cup
Red Onion - 1/2 finely chopped
Ginger - Garlic Paste - 1 tsp.
Green Chilies - 1 fine chopped
Tomato - 1 fine chopped
Mustard Seeds - 1 tsp.
Curry Leaves - 4
Salt as per your liking
Turmeric Powder - 1/2 tsp.
Cumin Powder - 1 tsp.
Sambhar Powder - 1 tbspn.
Coriander Leaves - A Handful, finely chopped
Oil - 1 tbspn.
Water - 2 Cups

Method -

Boil the water with a pinch of salt and as it begins to boil, put in the nuggets. Allow to boil for 4-5 minutes. Then turn off the heat and close the lid on the vessel for another 5 minutes. Then thoroughly wash the nuggets in cold water. This will take away the raw smell of the nuggets.
Heat oil in a wide bottom vessel. Add mustard seeds and wait for it to crackle. Then add curry leaves, onions. Sauté for a minute or two and add chilies, ginger-garlic paste, salt and turmeric. Sauté for 3-4 minutes. Now add tomatoes, cumin and sambhar powder.

Note - If you don't have sambhar powder, add one teaspoon each of coriander, pepper and garam masala powders.

Sauté really well till the oil frees itself from the gravy. Now add the nuggets and half a cup of hot water. Let it simmer for 10 minutes. Garnish with coriander leaves.


Saturday, April 25, 2015

Chocolate Swiss Roll

Here's a wonderful secret I am letting you in on. This absolutely sinful dessert has no flour and no butter. Yes, you read that right! I was shocked too when I read the recipe but it is true and it is one of the best looking and definitely best tasting desserts I have ever made. Without further ado, I present to you, the exquisite chocolate swiss roll.


For this you will need -

15in by 10in Sheet Pan
6 - Eggs
120 gms - Baking Chocolate (semi sweet)
50 gms - Sugar
1 1/2 tspn - Vanilla Extract
1/8 tspn - Salt
250 ml - Heavy Whipping Cream
2 tblspns - Sugar
6-8 - Fresh Strawberries (blended), if planning to finish the Swiss roll the same day, else use
2- 3 tblspns - Strawberry Preserve

Method -

Prepare the sheet pan by lining with parchment paper and then applying butter on top.

Separate the yolks and the whites when the eggs are cold. Wait for thirty minutes to let them come to room temperature.


Ensure that your mixing bowl is dry and free of any dirt. Put the whites and start beating till it begins to froth. Now add the salt, just a pinch and keep beating till you get soft peaks. Since my mixer has only one bowl I put the beaten egg white in a different container, if you have two bowls, then leave the egg whites in the bowl you mixed.


Now, take the yellows and beat till you get beautiful ribbons when you lift with a spatula. Add the sugar and keep on beating till mixed. In the meantime break the chocolate into small pieces.


Melt in microwave on high for 45 seconds or when the chocolate just melts. Do not over heat, it will ruin the texture and burn the chocolate. Alternately, heat in a double boiler that is boil water on the cooktop and put the chocolate in another bowl placing it on top of the boiling water. The steam from the water will melt the chocolate. This will take longer but will definitely not burn the chocolate.


Add this melted chocolate and vanilla extract and beat till mixed. Now fold the whites into this mixture, making sure not to over mix but be sure to mix them well. Pour this batter on the sheet pan and spread it out evenly. Bake at 180deg C for 15 minutes. It won't rise much. It shouldn't.


It will come out looking quite sad but don't be fooled by it's looks. To prepare the icing, beat the whipping cream with sugar, vanilla and strawberries (fresh or preserve) till soft and fluffy. To ensure a good icing, have all utensils and ingredients cold, straight out of the refrigerator. Spread the icing evenly on the cake after it has cooled.


Now, start to gently fold the cake from the shorter end. It is easier from this end. If you want a longer roll, then you can fold from the longer end. I have never tried that. A little bit of the cake may stick to the parchment paper, that is fine. Once rolled, use the remaining icing to spread on the outside and as much as possible underneath too.


Cut into beautiful slices and serve.


Wednesday, March 18, 2015

Rose Apple Tarts

My friend's mom is an innovative and adventurous cook. She keeps posting her delicacies on Facebook and this was one of her recent posts. They looked so divine, I had to try it. They are super easy and super quick to make. I bet you can impress anyone with these!


For this you will need -

1 Cup - All Purpose Flour
1 - Red Apple
2 Tbspn - Sugar
1 Tbspn - Honey
3 Tbspn - Water
1/2 Stick (approx. 50g) - Butter

Method -

Cut apple in half and remove core. Then slice each half into thin slices. Put these in a vessel and add the honey and water. Now cook these slices for about 3-4 minutes till just soft. Don't overcook as then they won't retain their shape at the next stage.

In a mixing bowl, add the butter, flour and sugar. Mix with a tablespoon of the apple water to form a soft dough. Refrigerate this for 15minutes.

Then, take it out and roll out to about 1 inch thickness. Once rolled, cut out strips of about 2 inches width. Take one strip, place it horizontally in front of you and then place about 4 -5 apple slices, overlapping, along its length. Try not to get any liquid. Now gently roll this to automatically form the shape of rose. Place gently in a muffin wrapper.


Continue doing the same for the rest of the slices. Bake these at 350 deg F for about 15 - 18 minutes. Once baked, glaze with honey and dust icing sugar.


Sunday, February 8, 2015

Whole Wheat And Oat Bread

Warm fresh bread with soft butter and a dash of pepper sprinkled on top is something I just can't resist! The one time I was in Paris I went crazy just looking at all he breads that the bakers would display in the morning and from that time I have wanted to make bread. I did make it once but that was before I started blogging and then for some reason or another never tried making it.
Another reason for me to make bread is that my dear husband eats bread every morning. I feel like instead of serving store bought stuff, it would be so heartening for me to bake and give him fresh home made goodness that is healthy and delicious!

So here it is. This is a really simple recipe.


For this you will need -

2 Cups - Whole Wheat Flour
1 1/2 Cups - All Purpose Flour
3/4 Tspn - Active Yeast
1 1/2 Cup - Warm Water
1/4 Tspn - Salt
1/4 Cup - Oats
Olive oil just to smear the bowl

Method -

Take warm water in a large bowl and add yeast to it. Let stand for about five minutes so the yeast begins to do what it does best, froth! Then add the salt and the flours. Take a plastic or wooden spoon and mix toll you get a wet sticky dough. Lift this dough and smear the olive oil inside the bowl. Replace the dough and cover with muslin cloth. Keep this in a warm place for about two hours. The dough should rise and double in size approximately. Don't panic if it doesn't double in size. As long as it grows a little bit it is good.
If you are making this is summer or in a tropical place, you may want to check the dough every 30 minutes, once it has risen enough you are ready for the next step.

Then roll and knead the dough with oats and more flour so as to incorporate the oats and to finally have a dough that is not sticky. Shape like a an American football, dust with flour (to retain its moisture) and let it rest for about an hour and a half.

Pre heat the oven to 425 F and then make about 3 - 4 cuts of about an inch on top of the dough. Place this on a baking sheet on a baking tray. Place the dough on the top rack and on the bottom rack place another baking pan with hot water in it. This will help the crust to be a little more soft and the bread moist too. Make sure to use a metal or iron baking pan for the water, not glass or ceramic. Bake for about 25 minutes, till golden brown on top! Serve warm with butter or jam or just plain!

This wonderful recipe that I slightly tweaked is from - http://minimalistbaker.com/easy-homemade-wheat-bread/ Great blog, do check it out!